VW Tiguan · EA888 Gen 3 · CZPA · diagnostic & access
EA888 Gen 3 Water Pump / Thermostat Housing — Diagnostic, Access & Inspection (Tiguan CZPA)
How to recognise a weeping water pump / thermostat housing on a VW Tiguan 2.0 TSI (EA888 Gen 3), what sits above it under the intake, and what a full housing R&R involves — without pretending we already have a photographed DIY extraction on MD18 BYU.

This is a focused satellite to the EA888 Gen 3 reliability owner review — not a duplicate of that pillar. Platforms and owner themes live on the Volkswagen Tiguan hub.
Written around a real 2018 VW Tiguan SEL 4Motion (reg MD18 BYU, engine CZPA). Coolant capacity on typical MK2 2.0 TSI specs is about 8.0 L — treat that as indicative and confirm against your handbook / VIN data before any refill job.
Inspection-first only. We do not yet have owner photos of pump extraction on MD18 BYU, so this guide stops at diagnosis and access context. A full remove-and-replace HowTo will follow after a dedicated photo shoot — we will not invent extraction steps or OEM part numbers to fill the gap.
Symptoms & when to stop driving
Gen 3 EA888 water-pump / thermostat housings commonly weep from heat-cycled plastic. Early signs often appear before a dramatic overheat:
- Repeated “low coolant” warnings or a bottle that needs topping up with no obvious hose spray.
- Sweet syrupy coolant smell near the grille or under the bonnet after a drive.
- Pink or green crust / dried trails under the intake manifold area or along the timing-cover side of the block.
- Rising temperature gauge behaviour, heater that goes cold, or limp feel once the system is genuinely low — treat as urgent.
Stop driving: If the temperature climbs into the red, the heater blows cold while the engine is hot, or you are adding coolant every short trip, park it. Running an EA888 dry can warp heads and cook the turbo. Flatbed or short careful drive to a specialist only if the gauge stays normal and you have just topped up for that trip.
Visual inspection / leak evidence
You are looking for coolant residue, not a textbook crack photo from above. On many MK2 Tiguans the integrated pump / thermostat housing lives under the intake path, so early evidence is often crust, staining and smell rather than a clear housing face.
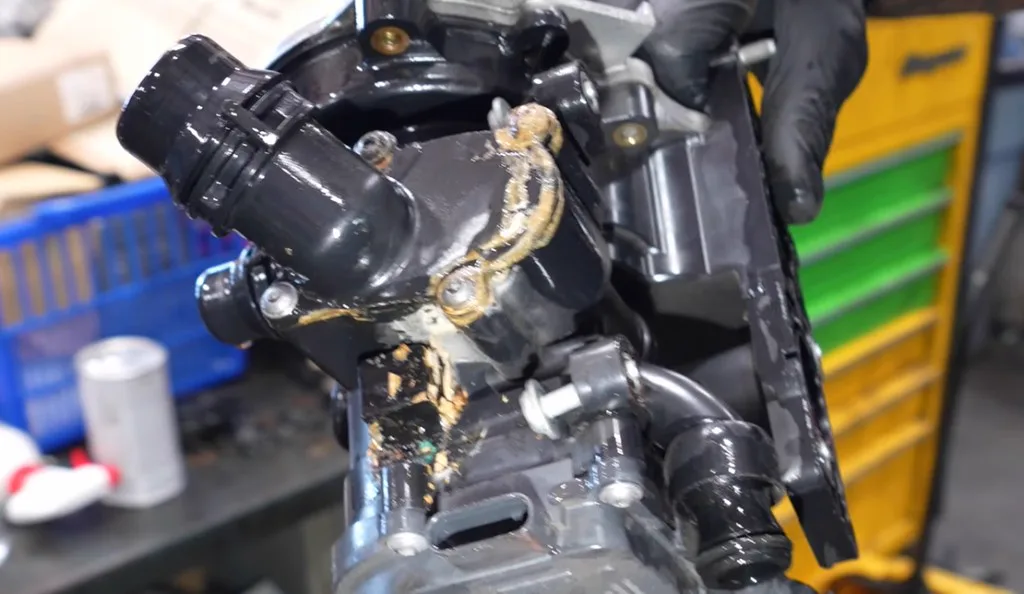
Practical demonstration of EA888 Gen 3 water-pump housing leaks and removal context: Watch the water-pump housing demo on YouTube
On an intact car, expect to see residue at the edges of what you can reach with a torch and mirror — not a full housing portrait until intake components come off.
What sits above the housing (intake path / access)
The plastic water pump / thermostat housing on Gen 3 EA888 sits low on the engine, typically under the intake manifold path. That is why “just glance at the pump” is rarely honest workshop language — you are looking past charge pipes, the manifold, and related bay clutter.
Without removing the manifold you can often still confirm a leak story (level loss, smell, crust at reachable edges). Confirming a cracked housing face usually needs the intake path cleared — the same access path used for walnut blasting and some injector work.
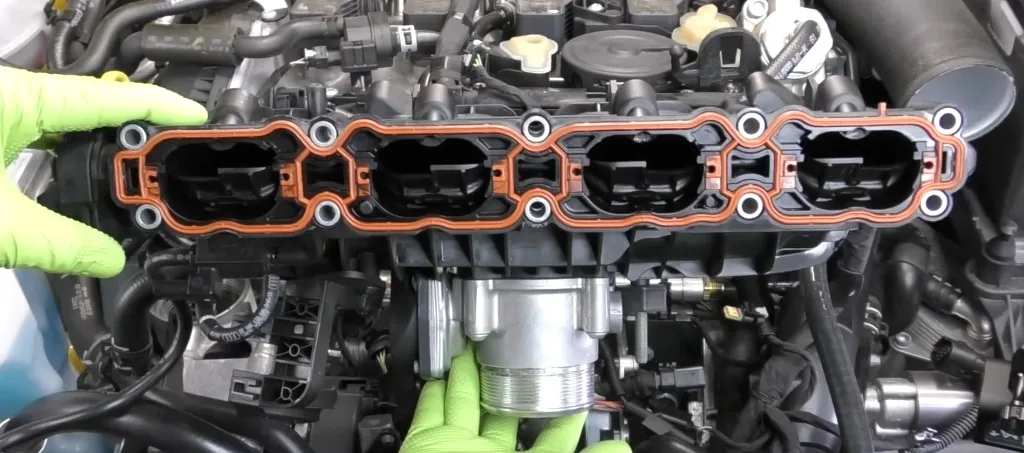
Manifold removal is the usual access step before you can fully see or replace the housing: Watch manifold removal guide on YouTube
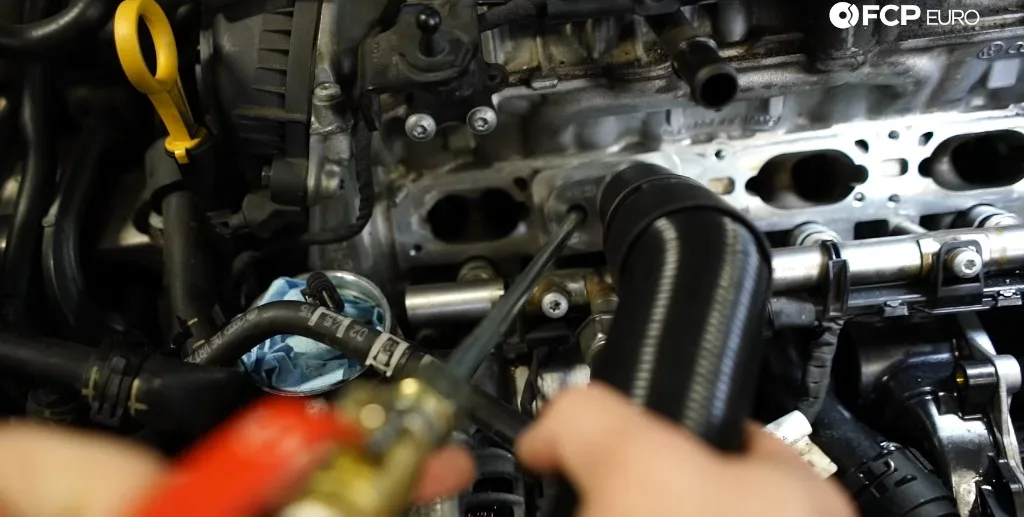
If a workshop quotes intake-off labour for carbon cleaning, ask whether they also inspected the pump / thermostat housing while they were there — it is the same neighbourhood of the bay.
Inspection steps (diagnostic only)
These steps are for confirming leak evidence and deciding whether to book a housing R&R. They are not a remove-and-replace procedure.
1. Inspect cold — level and warning history
With the engine fully cold, check the coolant expansion bottle against the min/max marks and note any recent low-coolant warnings. Do not open a hot pressurised system. Record the mileage and what you see — even “topped up X ml” is useful provenance.
2. Torch the intake / housing neighbourhood from above
Remove the engine cover if fitted. Use a bright torch (and an inspection mirror if you have one) to look under the intake path toward the thermostat / pump housing area. Look for pink or green crust, wetness, or dried trails — not for a perfect portrait of the housing face.
3. Check under-car and bay edges for trails
Look along the timing-cover side of the block, under-tray edges and the ground where you park for dried coolant stains. Coolant can travel before it drips, so a stain under the middle of the bay can still be housing-related.
4. Smell and heat-cycle context after a drive
After a normal drive, with the engine off and cooling, note any sweet coolant smell at the grille or under the bonnet. Pair that with whether the bottle level dropped. Smell alone is not a diagnosis — combine it with residue and level history.
5. Optional scan — then log findings
If you have OBDeleven or VCDS, scan for temperature / thermostat-related faults and photograph live data only as supporting context — do not invent a code story without a scan. Then log what you found (photos of crust, top-up amounts, codes) in a digital service history.
What a full housing R&R involves (labour shape)
A complete water pump / thermostat housing replacement on Gen 3 EA888 is an intake-off style job for many workshops — not a five-minute gasket tweak. Shape of the work, without fake extraction choreography:
- Labour shape: clear intake / charge-pipe path, disconnect coolant hoses (spring clamps), unbolt the integrated housing / pump assembly, fit the replacement unit with new seals, refill and bleed the cooling system, then verify for leaks on a heat cycle.
- Plastic OEM-style housings: the common failure mode is heat-cycle warping / cracking of the plastic body. Many 2018 CZPA cars still carry this design unless a prior owner already upgraded.
- Aluminium aftermarket housings: popular upgrade path to reduce repeat plastic failures. We are not listing OEM or aftermarket part numbers here — match the revised genuine VW part or a quality aluminium unit to your VIN with a parts specialist.
- Coolant: expect a full drain/refill with the correct VW coolant family for your market (commonly discussed as G13 / G12evo depending on year and region). Indicative system volume ~8.0 L on many MK2 2.0 TSI specs — confirm before you buy fluid.
- Unknowns we will not invent: OEM part numbers, bolt torque in Nm, bleed-procedure software adaptations, or a claimed pump-replacement mileage on MD18 BYU. Use erWin / dealer data / a VAG specialist for torque and P/Ns.
Full photographic R&R HowTo for this club car is planned after we shoot the extraction on MD18 BYU. Until then, treat workshop quotes and this diagnostic guide as your decision tools — not a DIY bolt sequence.
Recommended workshop videos
Independent walkthroughs that show MQB Tiguan engine-bay access and water pump / thermostat housing R&R shape — useful alongside this inspection-first guide, not a substitute for VIN-specific torque or part data.
2019 Tiguan water pump housing
GremcoGarage walks through bay access on an MQB Tiguan and the integrated housing remove-and-replace path: clearing the intake neighbourhood, disconnecting coolant hoses, unbolting the pump / thermostat module, and the refill / bleed shape (~12 min).
GremcoGarage — independent workshop video; not Owners Club footage.
Complements this diagnostic guide only. We have not yet photographed pump extraction on MD18 BYU; a full Owners Club R&R log with our own photos will follow after a dedicated photo shoot.
Watch on YouTubeCost bands (independent garage ballpark)
Same indicative ranges as the EA888 pillar for water pump + thermostat housing (parts + labour). Dealer pricing and aluminium upgrades sit toward the top of each band.
| Job | Interval | UK (£) | RO (RON) | EU (€) |
|---|---|---|---|---|
| Water pump + thermostat housing | Inspect ~60,000 km — replace at first leaks | £350–£650 | 2.000–3.500 RON | €400–€750 |
Your locale column is highlighted. Mid-2020s independent-garage ballparks — not a quote. Aluminium housings and dealer labour push higher.
Tools — inspection vs full job
Keep the shopping list honest: inspection needs almost nothing; a full R&R needs a real toolkit and the correct coolant. No invented torque figures.
For inspection
- Bright torch / inspection light
- Inspection mirror (optional but helpful under the intake)
- Nitrile or workshop gloves
- Optional: OBDeleven or VCDS for a supporting scan
For a future full R&R (shape only)
- Long Torx / hex set suitable for intake and housing fasteners (exact sizes from workshop data for your VIN)
- Spring-clamp pliers for coolant hoses
- Correct VW coolant (G13 / G12evo family as specified for your car) — budget around the ~8.0 L indicative capacity
- Drain pan, funnels, and a way to catch spills from an intake-off coolant job
- Torque wrench — use manufacturer Nm values from erWin / dealer data; we do not publish guessed figures here
Log findings in digital service history
Even a “weep confirmed — booking R&R” note with photos and mileage is stronger than a verbal story at sale time. Start a free digital service history or create a garage, attach crust photos and top-up amounts, then stamp the eventual housing replacement with part type (plastic vs aluminium) when it happens.
Related Tiguan / VAG guides
Keep this diagnostic satellite next to the rest of the MK2 cluster:
- EA888 Gen 3 reliability (owner review) — full failure map, costs and pre-purchase checklist.
- Bank 1 Sensor 1 O2 / lambda top-access DIY (CZPA) — another top-bay CZPA job without a lift.
- Haldex Gen 5 / 4Motion service — strainer clean, not fluid-only.
- OBDeleven 3 Pro pillar — tooling context for scans and adaptations.
- Hidden features (OBDeleven / VCDS) — Tiguan coding / comfort extras.
Disclaimer
Owner / community diagnostic guidance for typical EA888 Gen 3 water pump / thermostat housing leaks on MK2 VW Tiguan (CZPA reference). Not a workshop manual, not a substitute for VIN-specific torque / part data, and not a claim that MD18 BYU has had a pump replacement. Incorrect coolant work can overheat or damage the engine. If unsure, use a VAG-experienced specialist. The Owners Club is not affiliated with Volkswagen AG.
Guárdalo todo en un historial de servicio digital
Importa el historial MOT oficial DVSA, registra trabajos DIY y de taller, y construye una procedencia en la que confíen los compradores — gratis para empezar.